topamax once a day

Raspberry Pi + Apache


Its quite easy to install the Apache web server on the Raspberry Pi. This process assumes you have Debian for Raspberry Pi installed on an SD card. If not, see RPi Easy SD card setup. Open a terminal (or login via SSH) and install the package with apt-get:

sudo apt-get install apache2

UPDATE: 9/18/12: The following group creation error appears to have been corrected in an updated package and should no longer be necessary.  

However, the install will not complete successfully:

Setting up apache2-mpm-worker (2.2.16-6+squeeze7) …
Starting web server: apache2apache2: bad group name www-data
Action ‘start’ failed.
The Apache error log may have more information.
failed!
invoke-rc.d: initscript apache2, action “start” failed.

While the errors suggests that the Apache error log may have more information… it does not! However, bad group name is a clue. For some reason, apache user www-data gets created correctly, but the apache group does not. This is corrected by the following actions:

sudo addgroup www-data
sudo usermod -a -G www-data www-data

And then restart the apache web server:

sudo /etc/init.d/apache2 restart

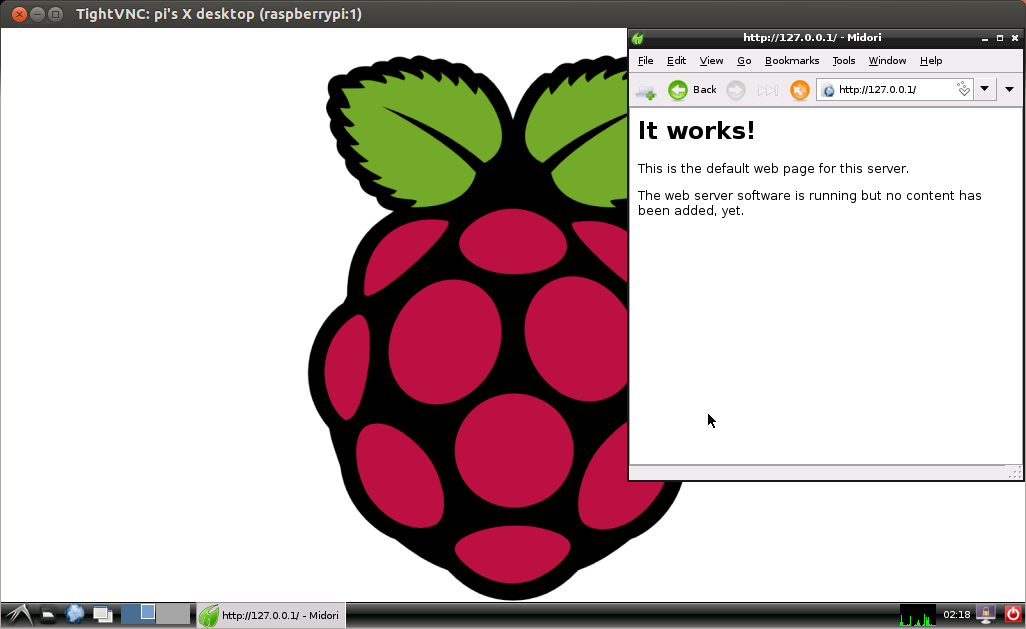
That’s it! You can confirm that it is working by opening a browser and navigating to the web server root. To do this locally on the Raspberry Pi, open up a web browser such as Midori, the pre-installed browser on the Debian image, and navigate to:

http://127.0.0.1/

Alternatively, navigate from a browser on another machine on your local network, only substitute the local address of the Raspberry Pi. To find the address of the Raspberry Pi, open a terminal and run:

ifconfig

Then navigate to the corresponding IP address of the Pi.


  • Pingback: Wordpress on Raspberry Pi | MitchTech()

  • Justin

    I spent ages trying to work out why it wasn’t working! Thanks for this guide it saved me hours more!!!

    • Glad you found it useful!

  • rustybikes

    Brilliant! This is a neat little cookbook to get a working RPi Apache server. I just got the “It works!” default page. Took less than 10 minutes to get it going. Saved me a BUNCH of time. Thanks!!

    (now off to get PHP happy… ha.)

  • Thanks for your post! I had the same problem and that was the solution. I will link you in my blog!

  • Pingback: Apache webserver y mysql en Raspberry Pi | |()

  • Matt

    Hey, this is brilliant, thankyou. I was wandering if you had any tips for speeding up wordpress on the pi? I previously used cherokee instead of apache and there were a few memory related settings including “skip-innodb” which really helped speed it up. Can you do the same this on Apache?

    Cheers.

  • Markus

    Thank you. Thats its

  • PJ

    Just ran through this guide (thanks very much!).

    (Also just retyped that first line out again after writing it into the terminal on my pi instead of the browser on my pc!)

    I didn’t get the error you mentioned and browsing to the Pi’s IP address from a networked machine got the “It Works” page straight away.
    Looks like they fixed the group creation?

    • Thanks for sharing PJ, it appears that the error with group creation has been corrected in the updated apache package.

  • RC

    Super – many thanks.

  • Dave

    Hi-
    I followed your tutorial, and I can see the site when I access it through http://localhost/ on my pi. I can also confirm the ip address as 127.0.0.1 when I run ifconfig, however the site doesn’t show up when I direct the browser of a locally networked computer to 127.0.0.1, giving me a ‘cannot connect’ error.
    What’s really confusing is that when I ping 127.0.0.1 from a local computer, it comes back just fine.
    Am I missing something?
    Thanks for the tutorial!

    • PJ

      Dave, 127.0.0.1 (localhost) is a local IP address regardless of which machine you are using. Pinging 127.0.0.1 from the pi, you are pinging the pi. Pinging 127.0.0.1 from a pc, you are pinging your pc.
      In a normal household setup your pc, pi, mobile phone (assuming you have wireless set up) and any other laptops etc should have an IP address of something like 192.168.0.x where x can be anything from 1 (usually the router) to 254.

      If you open the command prompt on a windows laptop/pc and type
      IPCONFIG
      Or
      IPCONFIG /ALL

      You should find the IP address of the windows machine.

      Linux is something like
      IFCONFIG

      So you should be able to get the IP address of the pi this way also, not the 127.0.0.1 address. If you can’t see an IP address other than 127.0.0.1 you might have other issues like drivers not installed correctly or interface down etc.

      If you have the ip address of both devices, ping one from the other. Assuming this works, from the pc, put the IP address of the pi in your web browser of choice and your pi should serve the web page.

      Let me know how you get on (and if I made any sense 🙂

      Peter

      • Dave

        Peter-
        Thanks! It’s great to hear an explanation of what I recognized as a weird (127…) IP address. I’m not sure what went on during my first attempt, either me missing the real IP or it not showing up, however it’s all fixed now. I appreciate the knowledge!
        Dave

  • Brian
  • dan

    Hi. how many users can connect to that server?

  • Hey man, thanks a bunch for these tutorials, had this pi rockin in 5 min.