topamax once a day

MSP430 Launchpad + PWM

Inspired by this tutorial.

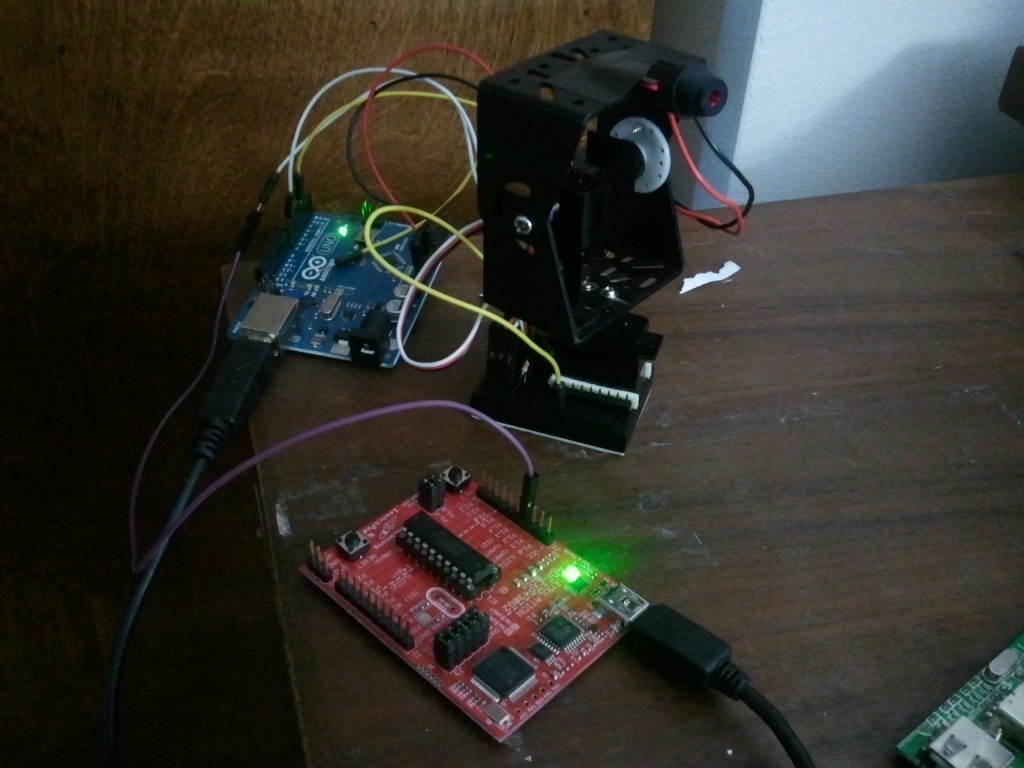
The following tutorial will describe how perform pulse width modulation using a MSP430g2553 TI Launchpad to control a sparkfun servo motor.


Prerequisites

Please see Cross-Compiling for TI MSP430 Launchpad to setup your development environment.


Hardware

  • Servo motor
  • MSP430
  • Power

I’m using the Arduino to power the servo motors. Alternatively you may use USB, a wall plug, or a battery. The MSP430 is being used to generate the PWM for control.

Connect your servo control wire to MSP430 pin P1.2.


Software

Save the below code as pwm.c

#include "msp430g2553.h" // make sure you change the header to suit your particular device.
 
// Connect the servo SIGNAL wire to P1.2 through a 1K resistor.
 
#define MCU_CLOCK           1100000
#define PWM_FREQUENCY       46      // In Hertz, ideally 50Hz.
 
#define SERVO_STEPS         180     // Maximum amount of steps in degrees (180 is common)
#define SERVO_MIN           700     // The minimum duty cycle for this servo
#define SERVO_MAX           3000    // The maximum duty cycle
 
unsigned int PWM_Period     = (MCU_CLOCK / PWM_FREQUENCY);  // PWM Period
unsigned int PWM_Duty       = 0;                            // %
 
void main (void){
 
    unsigned int servo_stepval, servo_stepnow;
    unsigned int servo_lut[ SERVO_STEPS+1 ];
    unsigned int i;
 
    // Calculate the step value and define the current step, defaults to minimum.
    servo_stepval   = ( (SERVO_MAX - SERVO_MIN) / SERVO_STEPS );
    servo_stepnow   = SERVO_MIN;
 
    // Fill up the LUT
    for (i = 0; i < SERVO_STEPS; i++) {
        servo_stepnow += servo_stepval;
        servo_lut[i] = servo_stepnow;
    }
 
    // Setup the PWM, etc.
    WDTCTL  = WDTPW + WDTHOLD;     // Kill watchdog timer
    TACCTL1 = OUTMOD_7;            // TACCR1 reset/set
    TACTL   = TASSEL_2 + MC_1;     // SMCLK, upmode
    TACCR0  = PWM_Period-1;        // PWM Period
    TACCR1  = PWM_Duty;            // TACCR1 PWM Duty Cycle
    P1DIR   |= BIT2;               // P1.2 = output
    P1SEL   |= BIT2;               // P1.2 = TA1 output
 
    // Main loop
    while (1){
 
        // Go to 0°
        TACCR1 = servo_lut[0];
        __delay_cycles(100000);

        // Go to 45°
        TACCR1 = servo_lut[45];
        __delay_cycles(100000);
 
        // Go to 90°
        TACCR1 = servo_lut[90];
        __delay_cycles(100000);
 
        // Go to 180°
        TACCR1 = servo_lut[179];
        __delay_cycles(100000);
 
        // Move forward toward the maximum step value
        for (i = 0; i < SERVO_STEPS; i++) {
            TACCR1 = servo_lut[i];
            __delay_cycles(20000);
        }               
        // Move backward toward the minimum step value
        for (i = SERVO_STEPS; i > 0; i--) {
            TACCR1 = servo_lut[i];
            __delay_cycles(20000);
        }
   }
}

Compile install and run the code!

sudo mspdebug rf2500
erase
prog pwm.elf
run

If your lucky then your device will have moved a bit and you might notice that the device didn’t reach its full range of motion.  You will need to play with the SERVO_MIN and SERVO_MAX constants to achieve the devices full range of motion.


Debugging

This section contains hints and debug strategies if things didn’t just magically work for you.


Header File

The biggest trouble I had was getting the correct header file. An incorrect header file did not produce any warnings.  The only feedback for a header file that didn’t match my board was the device moving less than 1 degree and behaving non-deterministic.  Look at the documentation that came with your board to find the exact device. A list of device headers can be found in the directory /usr/msp430/include/.


Erase

The mspdebug program hosts a suite of commands.  A list of commands can be gotten by typing help.  The erase command is one that I found late into the night. Be sure to issue the erase command before you issue the load command.


Is it broke?

Often times when things aren’t working you will wonder if you broke the board because you touched some pin, got pissed off and threw it across the room, or your kitty cat Mr. Bigglesworth played kitty frisbee with it.  Regardless of the reason you want some feedback that the board is still alive.  I like to reload a piece of code that blinks the development board built-in lights LED blinking tutorial.