Android + IOIO + Remote Outlets
This tutorial will demonstrate remote control of 3 AC outlets with Android and IOIO. The tutorial uses the 3 Channel Remote AC Outlets from DealExtreme. The cost, less than $25 shipped for the set of three, is quite a savings over alternatives like the PowerSwitch Tail ($25 each), also, they are wireless with a pretty good range as well.

They also have single and dual outlet version. Note: all three of these models are 110V/US plugs.
For additional background information on interfacing Android with IOIO, check out my other introductory tutorials:
Android + IOIO + Simple Digital Output
Android + IOIO + Simple Digital Input
Android + IOIO + Simple Analog Output
Android + IOIO + Simple Analog Input
Background on Android development, IOIO, and electronics:
IOIO for Android Beginners Guide
Hardware
Parts needed:
-
Android Device (1.6+, 2.1 for Bluetooth)
-
IOIO (available at Sparkfun)
-
3 Channel Remote AC outlet (available at DealExtreme)
-
6x NPN 2N3904 transistor
-
6x 10k ohm resistor
-
Breadboard
-
Power supply
-
Hook-up wire
Assembly
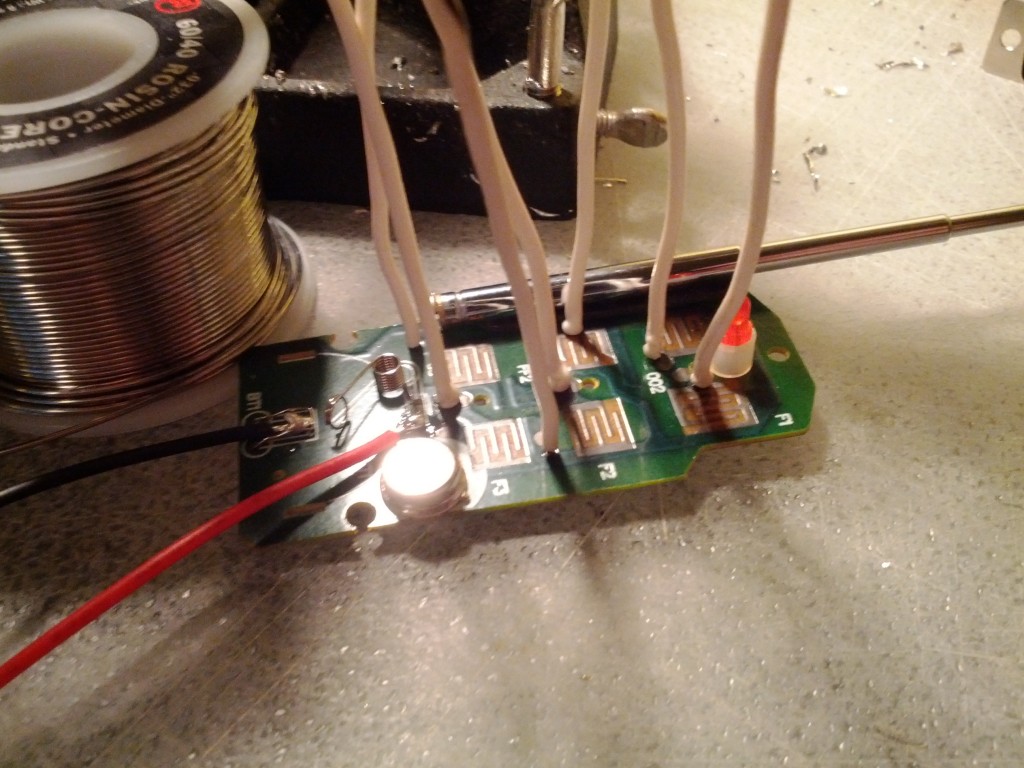
First, remove the outer plastic case from the remote controller. Looking at the board with the button side facing up, locate the seven solderable holes in the circuit board. Six correspond to each button (on/off for each outlet) and the seventh is the common line. Connecting any of the button lines to the common line will activate the connection, turning on or off the respective switch. Solder a wire to each of the switches and the common line:
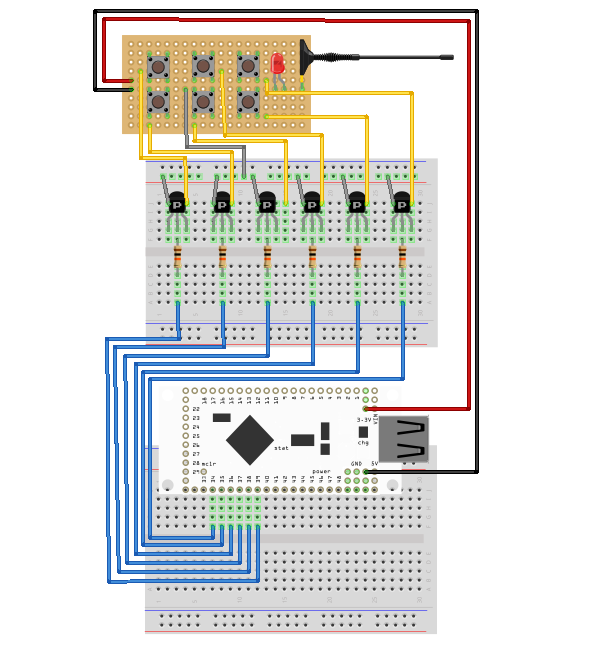
Connect each button line to the collector of a transistor and the emitter to the common line. Connect the base of the transistor to the desired IOIO pin with a 10k ohm resistor in series. Finally, connect the former terminals for the battery of the remote to +3.3v and GND on the IOIO. Here is a diagram of the completed circuit (created with Fritzing):
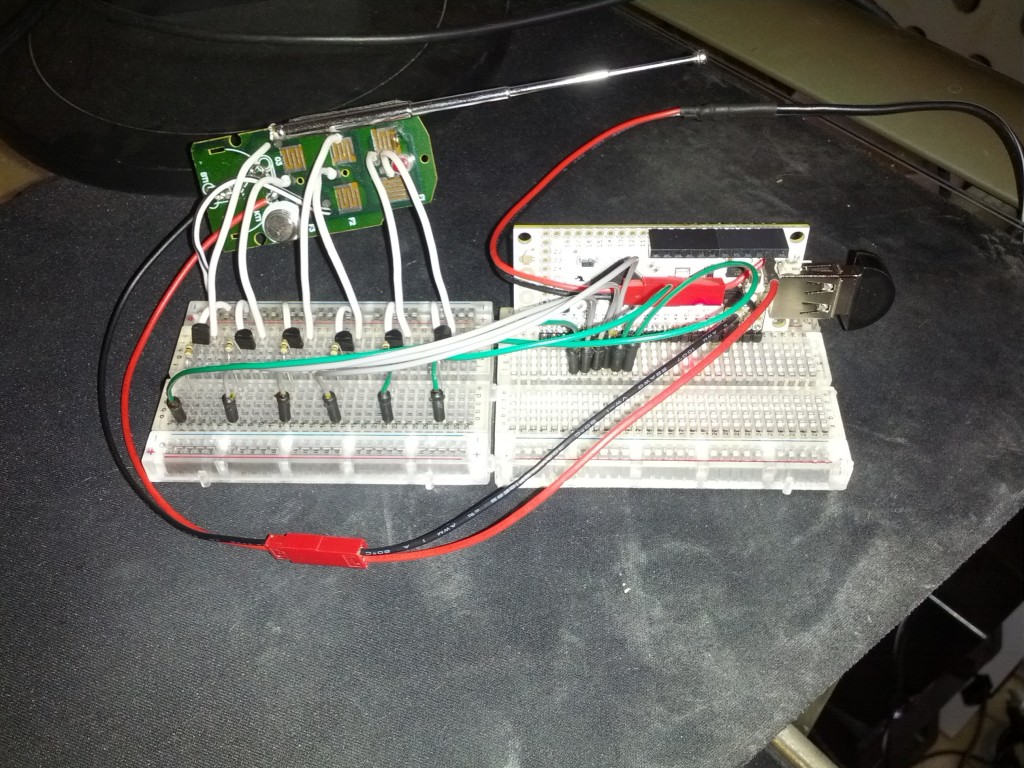
And here is a picture of the completed circuit:
Software
Get the source
With the circuit assembled, the next step is to get the demo application on the Android device. You can either download the pre-built .apk or checkout the source from Github:
git clone git://github.com/mitchtech/android_ioio_remote_outlets.git
If you are building from source, you will also need to import the IOIO Library project, and optionally the IOIO Bluetooth library projects, both available here:
git clone git://github.com/ytai/ioio.git
Install, connect, profit!
Finally, upload the app to the Android device (or browse to this page on the device and download the apk above). Connect the device to the IOIO, and start up the app.